Where can you find old-fashioned grits?

There are small, local area mills all over the south that have a long history of grinding corn into grits, cornmeal and corn flour for making all the traditional southern dishes that so many of us grew up enjoying. But if you don’t live close to one of those mills, or have moved away from the south, you may not have easy access to a source for stone-ground or cold-milled grits. If that is the case, here’s a list of purveyors of traditional, whole kernel, stone-ground grits from a variety of southern sources. Bradley’s is the mill in Tallahassee where I grew up and I love their grits. I’ve also tried several of the others on this list. You won’t go wrong with any of them, though you may find differences in the taste of the grits due to the corn used (all of these I believe are using old-fashioned “dent corn”, or a non-GMO variety) or the particular type of grind that the mill produces. You want to make sure you buy grits where the germ has not be removed from the kernel before grinding. This will require you to keep the grits in the freezer or fridge to prevent them going rancid, unless you quickly eat your way through a small bag of grits (which isn’t hard to do, by the way).

Anson Mills (SC)
http://www.ansonmills.com

Old Mill of Guilford (NC)
https://oldmillofguilford.com

Beaverdam Creek Mill (TN)
https://www.beaverdamcreekfarm.com/

Carolina Plantation (SC)
https://www.carolinaplantationrice.com

Weisenberger Mill (KY)
https://www.weisenberger.com

Palmetto Farms (SC)
https://palmettofarms.com

Geechie Boy Mill (SC)
https://geechieboymill.com

Old School Mill (NC)
https://oldschool.com

Bradley’s Country Store (FL)
http://www.bradleyscountrystore.com

Barkley’s Mill (NC)
https://www.barkleysmill.com

Woodson’s Mill (VA)
https://woodsonsmill.com

The Old Mill (TN)
http://www.old-mill.com

Atkinson Milling Company (NC)
http://atkinsonmilling.com


Old-Fashioned Sour Cream Pound Cake

This was the cake I learned to make many, many years ago. The recipe was given to me by a great aunt and I wrote it down in the back of grandma’s steno pad where she wrote down recipes. I hope you like it. If you follow the directions exactly as given, it will turn out perfect.

Note: This cake recipe requires a particular type of tube pan, the kind where the bottom and center tube can be removed. You cannot substitute an angel food pan where the bottom is not removable. The recipe also does not work best in a normal bundt pan, but you can try it. Search for “Loose Bottom Angel Food Pan” or similar on Amazon if you don’t have one.

1 cup (2 sticks) butter, at room temperature (using regular salted butter is fine)
2 ½ cups sugar
6 eggs, at room temperature
½ tsp baking powder
½ tsp salt
3 cups of cake flour
8 oz. (½ pint) sour cream (do not use reduced fat variety)
1 tsp. almond extract
1 tsp. vanilla extract
1 tsp. lemon or orange extract

1. Preheat oven to 325 degrees.
2. Generously grease (with Crisco) and flour a tube pan whose bottom is lined with wax paper. If you are using a bundt pan, make sure you get plenty of Crisco and flour into the ridges of the pan.
3. Sift the flour once to measure, then sift together the flour, baking powder and salt 3 times. This is important. Don’t skip this step. Set aside.
4. In a clean bowl, cream together the soft butter and the sugar for several minutes on high speed, occasionally scraping down the sides of the bowl with a spatula.
5. Add eggs, one at a time, beating very well after each addition. Each egg should fully disappear before adding the next one.
6. Alternately add one third of the flour and one third of the sour cream, beating well, but on low to medium speed, after each addition until all ingredients are thoroughly mixed.
7. Add the extracts and mix well on load speed until fully incorporated.
8. Spoon or pour batter into cake pan and gently even out any unevenness in the batter. The cake batter will be very thick and won’t really pour.
9. Bake for 1 hour 10 minutes, or until golden brown and a toothpick inserted in the crack that forms during baking comes out clean. Do not open the oven door while cooking until the cake has “crowned” and the large crack has formed in a circle around the top of the cake.
10. Let cool for 15 minutes, then run a sharp knife alone outside of cake so you can lift up the tube and cake and allow to finish cooling completely. If using a bundt pan, invert onto a cooling rack to finish cooling. Don’t let it cool for too long in the bundt pan or it won’t want to come out at all.


Linen Info

From: http://artisanssquare.com/sg/index.php?topic=874.0

LINEN WEIGHTS:

Sheer Weight (2.5 oz/yd2)
Thread count warp : 38
Thread count weft : 34
Curtains, apparel

Light Weight/Handkerchief (3.5 oz/yd2)
Thread count warp : 51
Thread count weft : 43

Middle Weight (5.3 oz/yd2)
Thread count warp : 46
Thread count weft : 37
apparel, bedding, pillowcases, interior design, home furnishings

Heavy Weight (7.1 oz/yd2)
Thread count warp : 38
Thread count weft : 32
apparel, placemats, napkins, table runners, bath towels, kitchen accessories

Canvas Weight (9.1 oz/yd2)
Thread count warp : 21 – 52
Thread count weft : 34 – 62
apparel, placemats, napkins, table runners, bath towels, kitchen accessories

Higher priced/premium linens usually have a higher thread count per inch.

Linen Sources:

Ulster Linen – https://ulsterlinen.com/

Fabrics Store – https://fabrics-store.com/

Couture Lin – http://www.couturelin.us/


I’m so very happy I am almost beside myself!

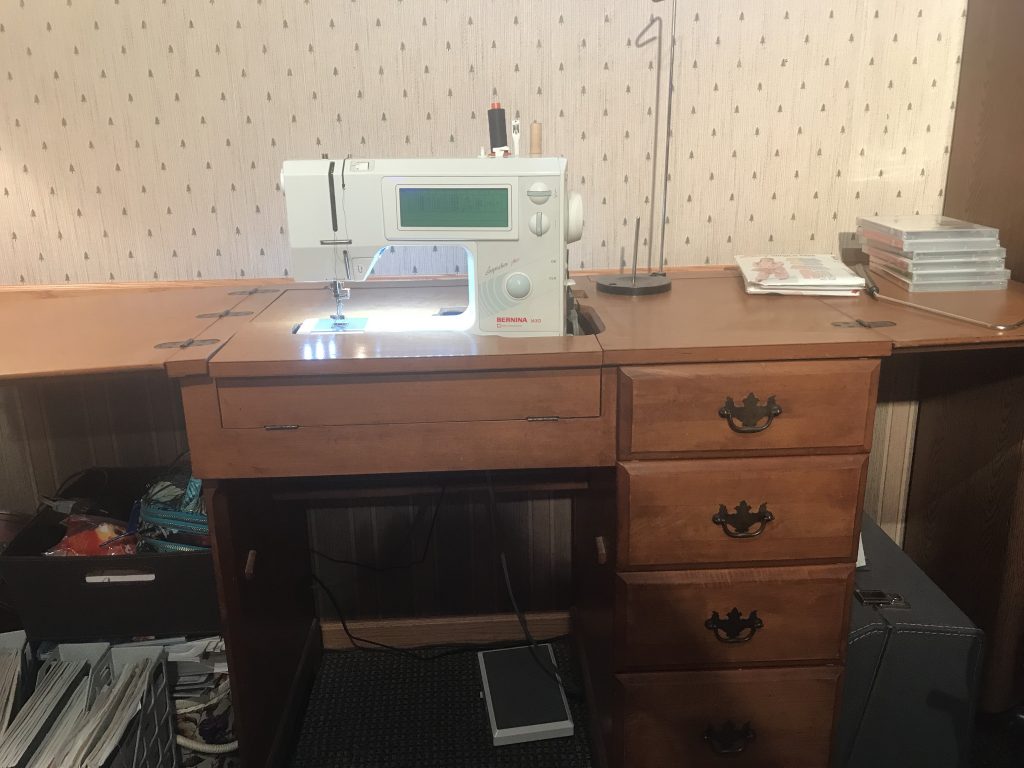
Today is definitely a stay at home day, after digging out from yesterday’s snowstorm. As I was laying in bed trying to get to sleep last night, my head was spinning with all sorts of sewing related ideas after spending all of Friday and Saturday at Bernina Academy learning how to master difficult fabrics. Suddenly, I had a brilliant idea. What if the beautiful sewing table I have downstairs in the den, which currently houses that lovely vintage Viking 6020, could be retrofitted to fit my 1630?! Could I make the 1630 fit? Would it take a lot of time?

This morning I was downstairs in the basement doing some work on my computer, trying to cool down and relax after so much shoveling, and I decided to try out my idea. I took the 1630 acrylic insert out of my Gidget II table and tried it on the wood sewing desk. An almost perfect fit except for about a half inch in one corner that needed tweaking. I got out my tools and hacksaw, unmounted the Viking 6020 and about a half hour later had my 1630 sitting beautifully in that solid oak desk, with drawers even!, that makes sewing SO (SEW?) much more enjoyable. I was so happy I coulda almost peed when it was done!

And if you aren’t sure what that means for my sewing room, I will tell you! It means I get my sewing workbench back, my serger can be left up permanent right next to my 770, my Brother can be left set up with the embroidery unit attached, and I still get to leave my Pfaff Performance 5 set up in a recessed table as well. I am BEYOND happy at the moment. Why in the world did I not think of this sooner?????


My chili recipe

Here is my personal chili recipe, for those that requested it:

1 1/2 pd. ground beef – use 80/20 or 85/15, but no leaner 

1 large white onion, diced

4-5 large cloves of garlic, peeled and finely minced or put through a garlic crusher

1 28 oz can crushed tomatoes

1 28oz can diced tomatoes

1 14 oz can dark red kidney beans, drained

1 14 oz can light red kidney beans, drained

3-4 tablespoons McCormick chili powder

2-3 tsp salt

ground black pepper to taste 

1 Tbsp Lowry season salt

1 tsp ground cumin

Brown the beef over medium high heat for several minutes, breaking up as it cooks.  When no longer pink, add diced onion and minced garlic and sauté until fragrant and onion becomes soft.  Season with salt and pepper to taste.  It should taste good to you.  Dump into the bottom of crock pot.

Add all of the remaining ingredients, stir well, cover and cook on low 6-8 hours.

If you use a different chili powder, you’re on your own figuring how much is enough, as various brands differ wildly in how hot they are and what other spices they contain.

You can substitute your own preference for beans.  Add more or less.  Try black beans, garbanzo beans or white kidney beans.  Or some other combo.

You can also add diced bell peppers, canned chipotle chilis, fresh minced chilis that you like, or juj it up however you like.  I usually don’t bother.

If you aren’t using a crock pot, simmer it on top of the stove for 2-3 hours.


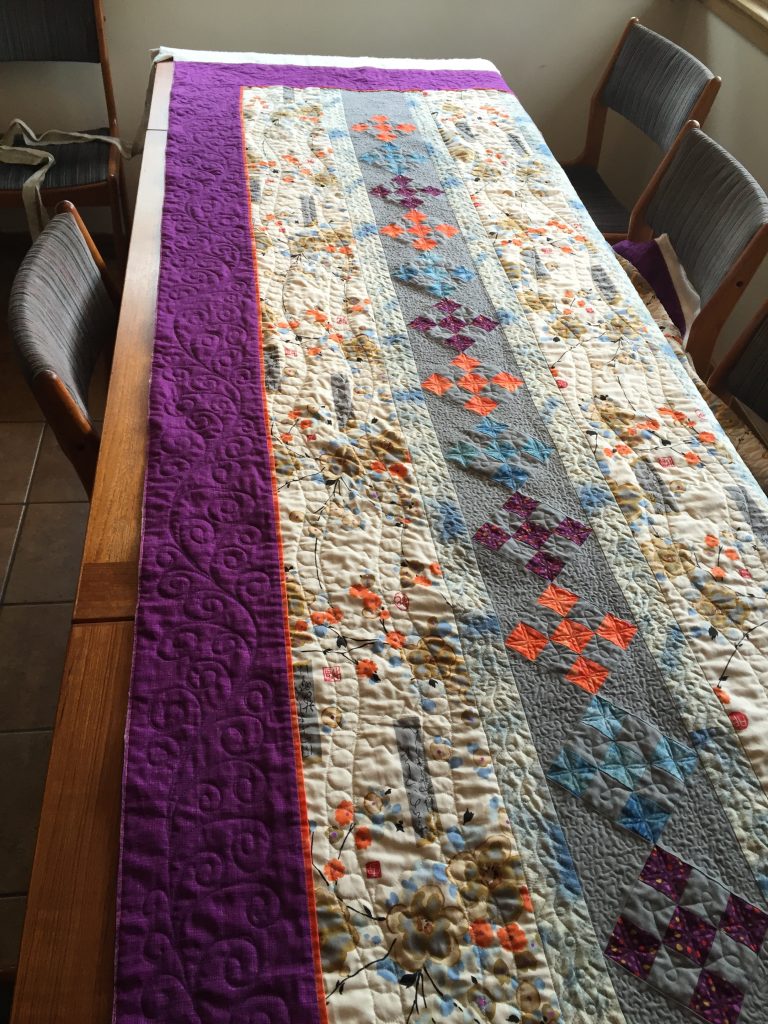
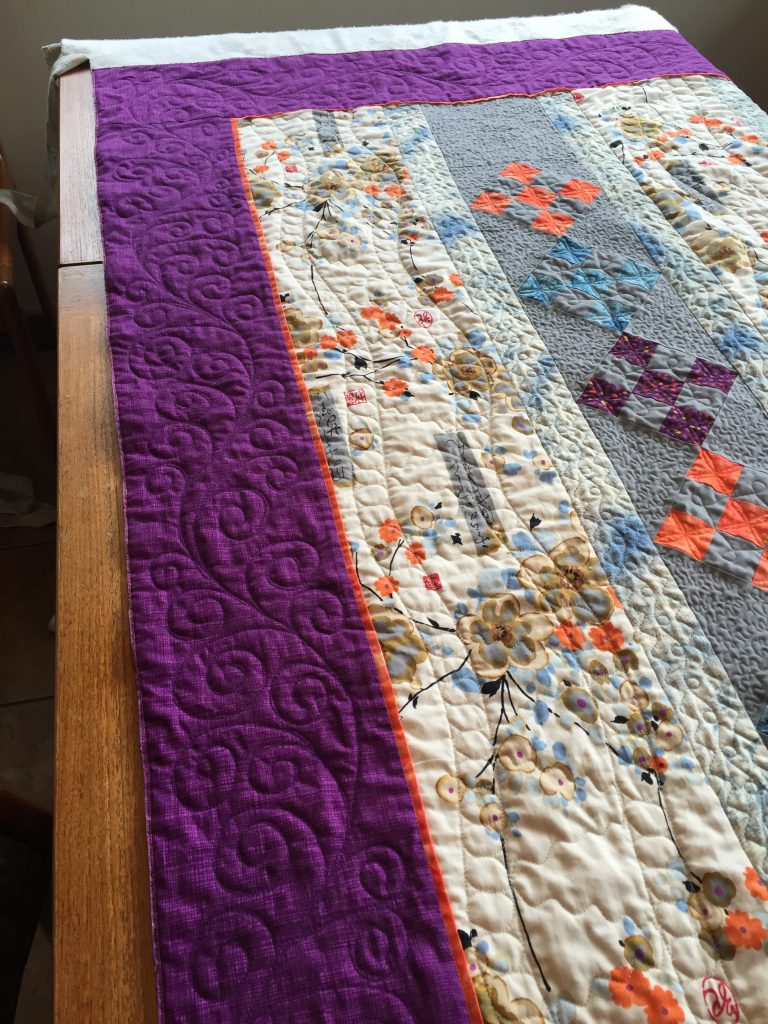
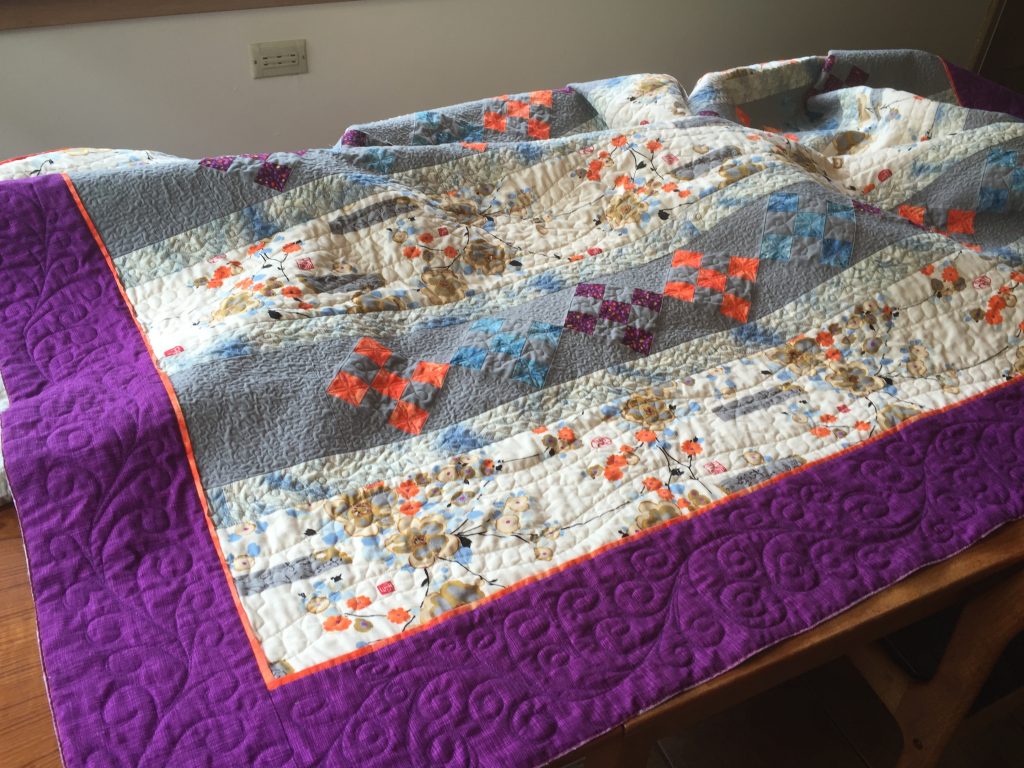
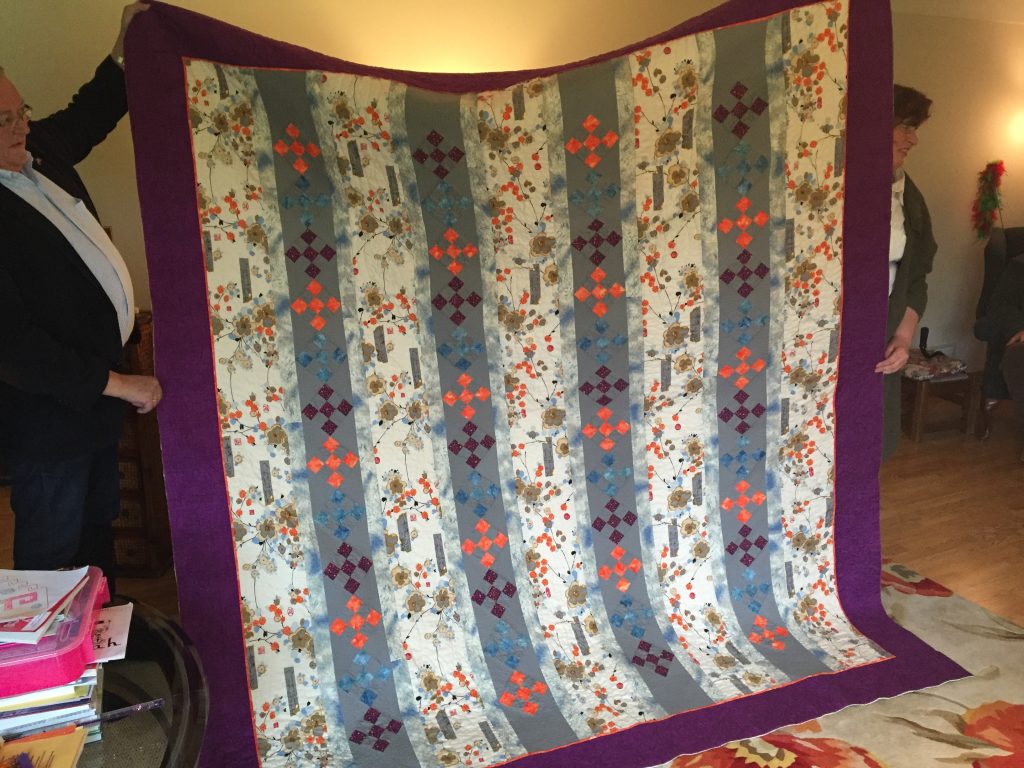
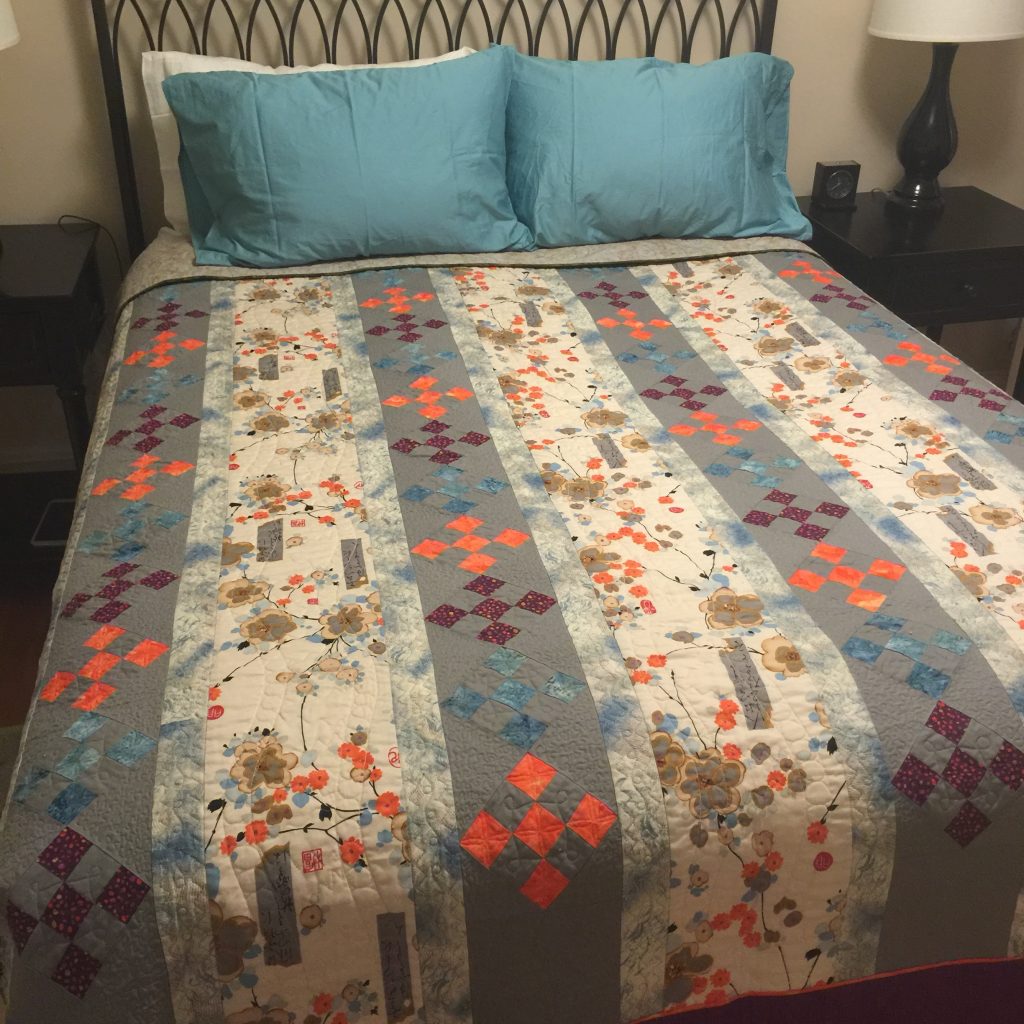
Pics of a quilt for D&J

This is the quilt I finished last year for Diana and Jonathan.  I didn’t share pictures at the time because I wanted it to be a surprise for them.  I am so pleased with the way it turned out.  I had so much fun quilting it, even though it took more than 2 months to finish the stitching.  I think it came out very well, and they sure seemed to like it!


We can forgive ourselves …

Sometimes the kindest thing you can do for yourself is to forgive yourself for not knowing something when you didn’t know it.  And being grateful instead that you have finally learned the lesson helps too.

Every since I begin making quilts in the spring of 1996, I have admired the machine quilting skills of others, especially those who make gorgeous quilts on their domestic machines at home.  I machine quilted the first quilt I ever made, be it ever so badly, and after that almost always sent my quilts out to be quilted by a long-arm professional.  I’ve never been disappointed with the results as I’ve always found long arm quilters who were exceptional at their craft, and adding their machine quilting skills to my piecing and design work was a collaboration I was happy to acknowledge. But as time has gone by, I’ve started making more quilt tops than I have money to get them quilted, and I also really started feeling this desire to make the entire quilt myself, to know that I was the creator of this quilt, for better or for worse, from beginning to end.

In November 2015 I took two machine quilting classes from Cindy Souder at the Minneapolis Sewing & Quilting Expo.  It would not be an understatement to say that experience changed my life.  Yes, she taught techniques, ones that I could duplicate at home and get good results – everything from using a walking foot to free motion quilting to using traced patterns.  She gave lots of pointers, some of which I already knew, like the value of using quilting gloves (which work exceptionally well for me), using a silicone slider on the machine bed, and about ergonomics and so forth.  But what she really taught me was something far more useful and elusive.  She taught me confidence.  And that is no small feat!  She taught me how to get over that fear of looking at the quilt and the machine and going “Nope – someone else is gonna do that!”  I left those two classes absolutely knowing that I could, in fact, quilt my own quilts and, with practice, actually become good at it.

Now, if you know me, you know that these classes were where I also fell in love with the Bernina 770QE that we used in class to do all our work.  I ended buying one of the classroom machines, as they offered them at a 33% discount when the weekend was done.  And I was the only person who had sewn on machine #12 that whole weekend, so I knew very well how perfectly this machine worked.  And it was a joy to get it home finally and begin some practice pieces.  My greatest creative accomplishment this past year was finishing a quilt for Diana and Jonathan.  It was a huge quilt, some 95″ x 115″, and was entirely quilted by me over a period of two to three months.  It gave me a great sense of satisfaction to get that quilt done, and I had a lot of fun sewing it too!

A few months ago, I decided to make some pieced and quilted place mats.  I wanted to use some of those beautiful heirloom-style stitches on my Viking Opal 690Q.  Viking has some gorgeous decorative stitches that seem unique to them.  I finished piecing the place mats some time ago, and pulled them out this week to figure out how to quilt them and get them finished.  Since my 77QE was set up for another project, I decided to use my trusty old Bernina 1630, the sewing love of my life.  I had recently acquired a #29 foot for my 1630, the clear quilting foot, and figured the smaller harp size on the 1630 wouldn’t present too much of a challenge for the small-ish place mats.  I threaded up the machine, put on the new foot and my gloves and finally sat down to quilt them this weekend.  And you know what?  That 1630 free motion quilts like a DREAM!  Utterly smooth, quiet, perfect tension top and bottom – just exquisite.  And for 22 years I have had that machine, and for most of those 22 years I have wasted time wishing that I was a good machine quilter.  But if you can never allow yourself to be a beginner at something, to even be bad at it, then how in the world are you ever going to gain the skill necessary to become good at it?  And as I sat there thrilled at the results I was seeing taking place in front of me, I was also keenly aware of the time over these years that I wasted simply wishing to develop a skill for which I already possessed everything I needed – but I just didn’t know it.  Perhaps if I had trusted myself a little more, I might have made a few more tentative attempts, might have learned how wonderful that 1630 really was for what I wanted to do.  Don’t get me wrong, I still love the extra space and the super large bobbins of my 770QE – both things make good results easier and faster to achieve.  But, honestly, when I think of the table runners, place mats, baby quilts, and other quilts I could have spent my time learning and working on, perfecting skills, instead of wasting those years only wishing for it … well, it gave me great pause.

Like I said, sometimes the kindest thing you can do for yourself is to forgive yourself for not knowing something when you didn’t know it.

Turkey Tetrazzini – my favorite recipe

I used to make this until I either lost or threw out the magazine that had the recipe.  Luckily, someone on the internet had re-typed it in response to someone’s question about best recipes for the disk.  This is my “go-to” recipe for this heavenly creation.

Source:  http://www.chowhound.com/post/turkey-tetrazzini-americas-test-kitchen-463386

I know this isn’t what you asked for, but I had to share.
This recipe ran in Saveur magazine in 1997. It is a staple in our house. I think we look forward to it more than the bird itself. it is rich delicious and has none of those green vegetable things.

“This creamy noodle dish, named for Italian coloratura Luisa Tetrazzini (1871-1940), is said to have originated in San Francisco. Whether it was first made with turkey or with chicken is debated, however. This is Anne Jaindl’s recipe.

1/2 pound wide egg noodles (like pappardelle, the name, appropriately, derives from the verb “pappare,” to gobble up.)
8 tablespoons butter (plus more for baking dish)
1/2 pound white mushrooms, sliced
6 tablespoons flour
salt, freshly ground pepper
3 cups turkey stock, warmed
1-1/3 cups heavy cream
1/3 cup dry sherry
1/4 teaspoon freshly ground nutmeg
3 cups coarsely chopped cooked turkey
1/4 cup freshly grated Parmigiano-Reggiano cheese

  1. Bring a large pot of salted water to a boil. Add noodles and cook until just tender. Drain and set aside
  2. Preheat oven to 375℉. Melt 2 tbs. butter in a large skillet over medium high heat. Add mushrooms and saute until lightly browned, 3-5 minutes. Add turkey and remove from pan, set aside.
  3. Melt remaining 6 tbs. better in same skillet over medium low heat. Sprinkle with flour, season with salt and pepper and cook, stirring, for 2 minutes. Then gradually add stock, whisking constantly. Increase heat to medium and simmer until sauce thickens, about 7 minutes. Add cream, sherry and nutmeg, adjust seasoning with salt and pepper.
  4. Place noodles in a lightly buttered medium baking dish (about 9” X 12”). Spoon turkey and mushrooms over noodles, top with sauce and sprinkle with cheese. Bake in oven until sauce is bubbly, about 30 minutes. Heat broiler and brown for 3-5 minutes. Serve warm.”